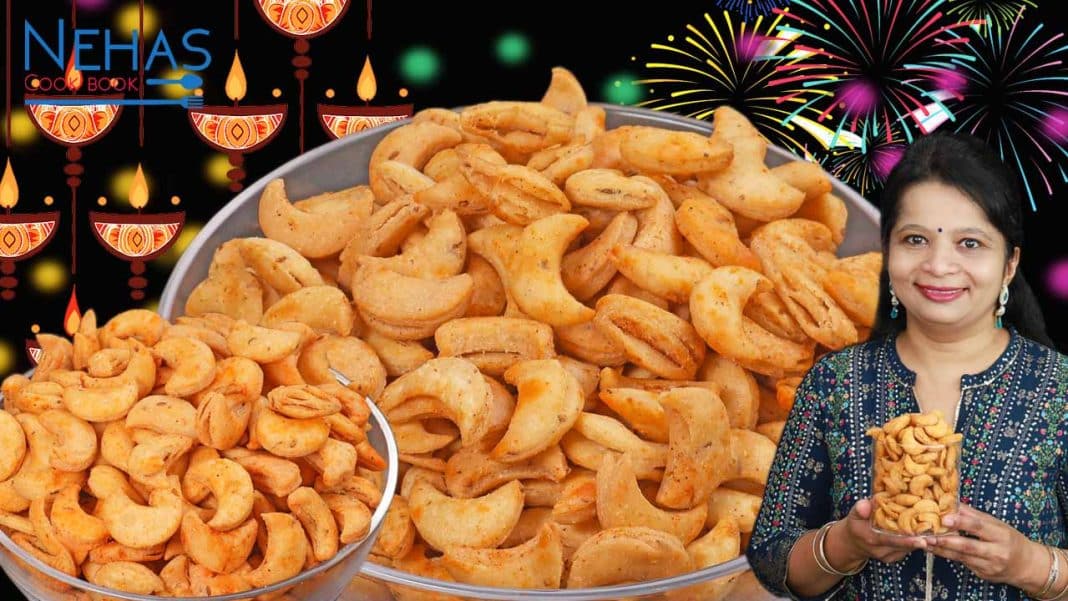
Khara Shakarpara (Masala Shakarpara) is a simple and easy-to-make savory snack prepared with a combination of flours and aromatic spices. While there are many ways to make shakarpara or shankarpali, in this recipe, I’m sharing a layered and masala (savory) version that’s flavorful and perfectly crisp.
To make them more attractive, I shape the shakarpara like kaju (cashews) and coat them with a special spice mix that adds a delicious, chatpata twist.
This all-time favorite crunchy and flavorful snack is loved by people of all ages. It also has a long shelf life and stays fresh for months when stored in an airtight container. I’m also sharing the ideal ingredient ratio and a few foolproof tips to help you make perfect namkeen or khara shakarpara on your very first try.
- Flour Combination:
I prepare the dough using a mix of maida, wheat flour, and rava. Maida gives a smooth texture, wheat flour adds a healthy touch, and rava contributes to the crispiness of the shakarpara. - Dough Texture:
The dough should be tight and smooth, firmer than regular chapati dough. The addition of hot oil (moyan) must be properly incorporated into the flour — it should feel crumbly and hold its shape when pressed between your palms.
Add water gradually in small batches to control the consistency. Roll the puris thin to achieve a crisp and brittle texture after frying. - Making Layers and Shaping:
To create layers in the shakarpara, brush the rolled dough with a ghee–flour paste. This step enhances the flavor and gives a beautifully flaky texture. In this recipe, I use maida for the paste, but you can also use cornflour or rice flour — though rice flour gives the best results. The paste should have a thin, smooth, and flowing consistency; avoid making it too thick. Adjust the number of folds depending on how many layers you want (refer to the video for technique). You can shape the shakarpara in any form you like — there’s no strict rule. The kaju shape is simple, elegant, and quick to make. - Frying Tips:
Heat the oil well before adding the shakarpara. Always add them to hot oil on high flame initially, as this helps the layers set properly. If you add them to cold oil or fry on low flame at first, the layers may not hold together.
Once the layers are set, reduce the flame to medium and fry until they turn golden brown and crisp on both sides. - Masala Coating & Storage:
After frying, immediately sprinkle the masala mix over the hot shakarpara and toss well so the spices stick properly. Allow them to cool completely, then store in an airtight container for a longer shelf life.
Recipe video

Khara shakarpara recipe | khari shankarpali | masala shakarpara
Ingredients
- 1 cup maida
- ½ cup wheat flour
- ½ cup rava - fine variety
- 1 tsp cumin seeds
- ½ tsp ajwain
- Salt to taste
- ½ tsp black salt
- ½ cup slightly hot water or as required
- Oil for frying
For ghee and flour mixture.
- 1 tbsp maida
- 1 tbsp Melted ghee
For masala
- 1 tsp kashmiri red chilli
- 1 tsp black salt
- ½ tsp salt
- ½ tsp black pepper powder
- 1 tbsp jaljeera masala
Instructions
- In a mixing bowl, add 2 cups maida, ½ cup wheat flour, and ½ cup fine rava. Mix well.
- In a mortar and pestle, add 1 tsp cumin seeds and ½ tsp ajwain. Coarsely crush them.
- Add the crushed masala to the flour mixture, along with salt and ½ tsp black salt. Mix well.
- In a pan, heat 4 tbsp oil until hot. Pour the hot oil into the flour mixture. Mix well and rub the flour between your palms to incorporate the oil evenly.
- Gradually add ½ cup slightly hot water and knead into a medium-soft dough. Add 1 tsp oil and knead for 2–3 minutes until smooth. Cover and rest the dough for 10 minutes.
- Once the dough is set, divide it into 4 equal parts. Take one portion and roll it into a large, thin roti.
- Roll all 4 rotis of equal size.
- In a small bowl, mix 1 tbsp ghee and 1 tbsp maida to make a sata (paste). Set aside.
- Take one roti and spread a thin layer of sata over it. Place the second roti on top and again spread a thin layer of sata. Repeat the same with the third roti, then place the fourth roti on top.
- Gently roll the stacked rotis with a rolling pin to slightly flatten and enlarge them. Using a round cutter, cut the dough into kaju-shaped pieces (refer to video).
- Heat oil on high flame. Add the shakarpara pieces, and after 1 minute, reduce the flame to medium. Fry on medium-low heat until they turn crisp and golden brown from both sides. Repeat the same process for the remaining pieces.
- Once cooled completely, store the shakarpara in an airtight container. They will stay fresh for up to 15 days.
Notes
- Rava adds crispiness to shakarpara.
- The proportion of wheat flour and rava should be half that of maida.
- Oil gives shakarpara a flaky and layered texture.
- 2 tablespoons of oil are perfect for 1 cup of flour.
- Heat the oil and add it to the dough mixture.
- Knead a medium-soft and smooth dough for shakarpara.
- Roll the dough into thin rotis; avoid rolling them too thick.
- Making sata with ghee and maida helps create good layers in shakarpara.
- Prepare the sata (a mixture of ghee and flour) to a liquid consistency and apply a thin, even layer over the rolled roti.
- Add the shakarpara to hot oil at a high temperature — never to cold oil.
- Fry the shakarpara over medium-low heat until golden and crisp.
